
The product is ready. The offer is real. The video folder is empty.
You can still make a simple promotional clip: show the actual product clearly, add one restrained movement if it helps, and put the buying information into editable text. You do not need to invent a busy unboxing scene or make the product perform a trick.
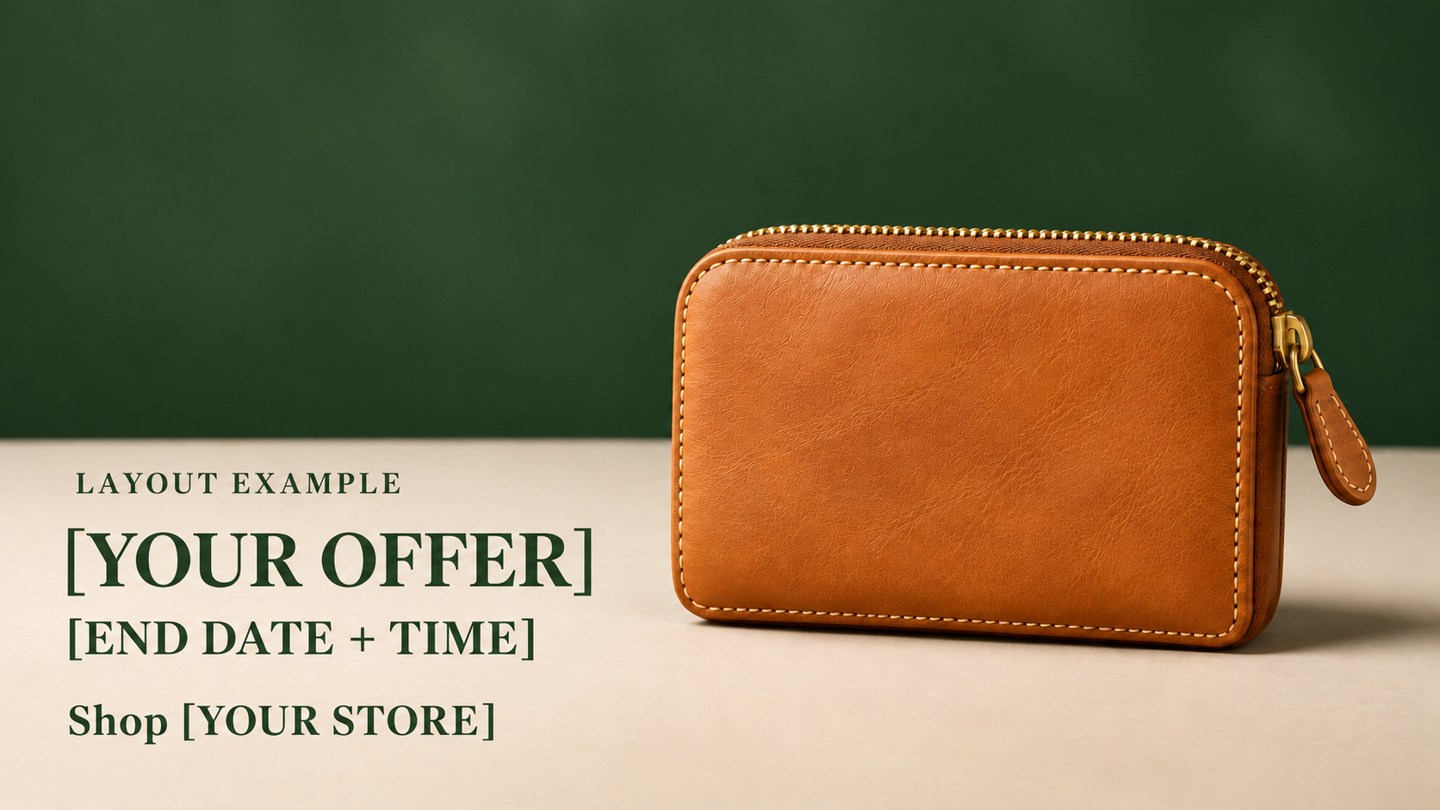
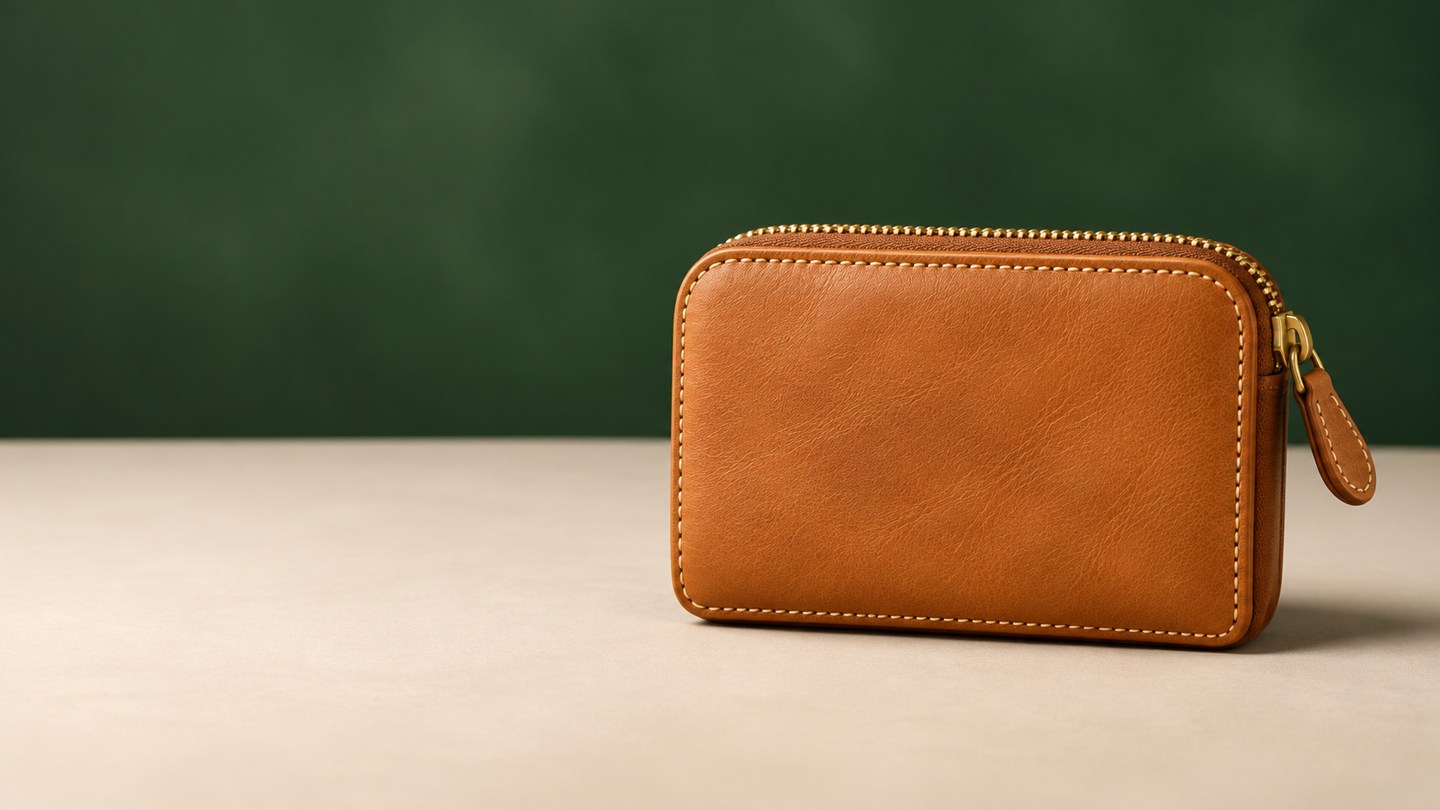
This guide uses an original fictional tan zip wallet as its teaching example. It is not stock from a real shop, and none of the illustrations is a tested video or a live promotion. Substitute a photo you can use and your own confirmed offer details.
Black Friday 2026 falls on November 27, as listed in Shopify's Black Friday timeline. Your shop's actual sale window may be different. Use the dates you intend to honour, rather than copying the event date into every deadline.
Start with the product and a real offer
Choose one item or clearly defined set. For the wallet example, the reference must show the tan color, cream stitching, brass-colored zipper and right-hand pull clearly. Keep an untouched copy of the source photo open for comparison later.
Use a photo with enough space for the full product and some text beside it. If the item fills every edge, choose a wider photo or plan a separate offer card. Do not shrink important conditions into unreadable type just to fit them around the product.
Before making motion, fill out this working brief. The brackets are editable fields, not an actual discount or shop claim.
- Product: [exact item or included set].
- Offer: [actual sale price and currency, or the genuine offer you are running].
- Price context: [regular price, only if accurate and appropriate to show].
- Conditions: [eligible variants, minimum spend, code or other material conditions].
- Sale window: [start date/time] to [end date/time, with time zone].
- Buying route: [actual product page, shop profile or ordering method].
- Order details: [relevant delivery, collection or other information customers need].
Check the same details against the product listing before proceeding. If a price or deadline is not settled, leave it pending in your working file; do not turn a placeholder into a published offer. There is no need for a percentage badge if the actual sale price is the clearest message.
Prepare two frames from the same photo
For this example, the only movement is a slow, slight digital push-in. The wallet stays closed, in the same position, with no new view of its interior. A crop can enlarge what the photo already shows; it cannot recover missing detail.
Make two working files in an image editor:
- First frame: your chosen clean product photo, without prices or promotional text.
- Last frame: a slightly tighter crop of that same photo, resized to the same output dimensions. Keep the crop centred on the same point and retain the entire item, including the pull tab and its shadow.
Start with a small change-roughly a five-percent enlargement is a proposed starting point, not a tested setting. If that cuts an edge or leaves no room around the item, reduce the change. Keep the original perspective and colors; do not replace the product with a newly generated "better" version.
Export the two files at the same aspect ratio and dimensions. A wide 16:9 composition works for the illustrated layout; if your destination calls for a square or vertical format, compose both inputs for that format first. Leave room for the offer throughout the movement. Upload the two prepared files separately, not a combined comparison sheet.
Try a short movement and inspect the product
Tool suggestion: OpenMaker is one option for the optional animation in this example.
Open OpenMaker with the two files ready. Its published free workflow is described as powered by MiniMax H3: five-second, 480p generation at zero credits, with no signup required. The site advertises unlimited attempts, but requests may queue and a particular result is not guaranteed.
Upload the first and last images in that order and select the matching ratio. Use this prompt for the wallet example, replacing the product description if yours differs:
A very slow, slight digital push-in from the first image to the last image. Keep the same closed tan zip wallet, cream stitching, brass-colored zipper and right-hand pull. Preserve its shape, color, material and proportions. The product stays still; no rotation, opening or bending. Keep the lighting and background steady. No hands, new objects, text, logos or scene changes.
Select Generate, wait for the preview and compare it with the untouched photo. Inspect the zipper, seams, corners and pull during the middle of the clip as well as at the endpoints. Reject invented pockets, shifting stitches, a different color or a product that bends as the camera moves.
If the movement is too ambitious, simplify the prompts or bring the two crops closer together. If the product still changes, use the actual still photo in the finished ad instead. Motion is optional; an inaccurate product depiction is not a useful substitute. Download only a preview you want to keep. This article does not report an actual generation test, identity-preservation result or sales outcome.
Add the offer in an external editor
Import the original photo and any accepted downloaded clip into a video editor that supports text layers. Its access and account requirements are separate from OpenMaker's generation step. Keep prices and conditions in those editable layers, rather than asking a model to draw exact lettering.
Build a small three-part sequence:
- Opening still: show the original product photo and [product name].
- Five-second motion section: show the accepted clip, with [actual offer] readable beside the product from the start of the section.
- Closing still or plain card: repeat [actual offer], [essential conditions], [deadline and time zone] and [buying instruction].
Set the still-card durations by reading the text at phone size. Extend the closing card if the conditions need more time; do not force all the information into the five-second generated section. Add no soundtrack unless you have audio you can use-the ad should also make sense without sound.
Here is copy you can edit, using only confirmed details:
Black Friday: [product name]
[actual price + currency OR actual offer]
[eligibility / code / material conditions]
Ends [actual date, time and time zone]
Shop [actual store name] - [where to buy]
Remove unused lines and every placeholder before export. Use "Shop our profile" only if that is genuinely where someone can find the item. A visual call to action is not automatically a clickable link; put the real buying route into the post's supported link or caption field when you publish manually.
Export the file you would actually post
Preview the whole sequence on your phone or at a similar display size. Can someone identify the product, understand the offer and find the deadline without pausing? Are conditions readable rather than hidden at the edge? Does the product still match its original photo?
Export a video in a format accepted by your intended destination, then play that exported file-not just the editor preview. Check the crop, text edges, sound if used, and the last card. A larger export resolution does not restore detail missing from a 480p source, so judge the real result at the size you intend to use it.
Save the editor project, the source photo, the accepted motion clip and the final export together. If your price or deadline changes before posting, update the editable text and export again. Keep the original product photo as the reference for the next version too.
You now have a concrete ad structure to finish with your own item and offer: a clear product, a small optional movement, and information a customer can actually use. Before posting, confirm the sale details one last time; the animation does not do that part for you.